Saturday, February 6, 2010

2/6/10 - Good Headway

By 2:30 this morning (Saturday), I nearly finished some of the little tasks that I had set for myself yesterday morning . . . and then some. It took a lot longer than anticipated, but I went to bed with satisfaction for the hard work exercised.

Lay the Last Floor Board
After my mom died three years ago, I busily set about fixing things in my house. One of the activities was to lay a new tongue and groove wood panel kitchen floor. Now I didn't know anything about laying a floor, but I did it anyway. Lo and behold, somehow I managed to forget to install one 38" x 2" partial floor board under the cabinet next to the stove! And that's how it sat years.  When we did the kitchen demolition the second week of november 2009 and installed the IKEA cabinets, that missing floor board was really apparent, so that was the first task.  I had a bunch of extra boards and it was relatively easy to cut one piece to the correct width.  Thankfully, IKEA cabinets have a nifty method for adjusting the height of the cabinets, so even though the granite-looking countertop was attached to the wall, I was able to shorten the cabinet legs on the front sufficiently to slide the new board underneath the cabinet, then readjust the leg height.  The lower right side of this picture is where the floor board was added. Done!


Finish the Niches
I had purposely left some spaces at the ends of the cabinet rows next to the outer walls to become useful niches for things like large cutting boards, folded paper bags, and/or serving trays (see the right side of the previous picture). But I never finished the empty spaces. They were just gaping holes between the cabinet and wall.  I got out the finished 2.5" x 72" planks from IKEA that are faced with the same veneer as the cabinets, got my jig saw, yardstick and pencil.  Sawdust had flown everywhere in my once-clean kitchen, but what resulted were two nice finished niches.  There is a third niche, though, between the pantry and kitchen wall that must be finished.  67% finished.

Replace the Dining Room Light
Here's the old kitchen light fixture. There's not much flexibility with where the light shines an it's a boring white:


I had to wait for a dry day during the day to do this one so I could turn off the circuit.  Friday was sunny most of the day.  I told my son that I hoped this task would be easy.  In my life, so many things are just not as easy as I think they should be, but I muscle thru the difficulty anyway because I want it done. Nobody's going to do it for me.  I have installed several lights, fans, etc., in my life so I know it's theoretically pretty easy to change out a fixture. Wrap the white wire attached to the fixture can in the ceiling to the white wire from the new fixture.  Wrap the black wire from the house to the black wire in the fixture.  Wrap the copper wire from the house to the copper wire in the fixture. Thread each of those pairs inside a separate plastic cap. Keep the three sets of wires apart from each other and carefully stuff them into the can inset into the ceiling. Attach the outside cover of the light fixture.

This time, everything appeared to go simply . . . except that while I was on the ladder I dropped one of the fancy hex nuts that held on the outer cover . . . and I couldn't find it anywhere! It must have rolled under the refrigerator, but I had to finish the job and leave the house for the Sojourner Truth Multicultural Museum to help them set up for their big art show on Saturday.  I found a standard hex nut lying around my toolbox and used that instead, but I've got to find the fancy nut one of these days!  99% finished.


Paint the Kitchen and Window Insets
I hate the pastel yellow paint that is on my kitchen walls. Originally, I wanted a light color to balance the black countertops and medium brown cabinets, so I bought a paint called "Light Beige." But it's really a simpering pastel yellow. I does not go with anything in my house. But I had to cover the unpainted areas that were left when the old 4' long florescent ballasts were removed to make way for the new halogen lights.

So I went into my tool shed and found one of my many partially-full paint cans which had a beautiful warm gold color and mixed some of that into a container with 2/3 the "light beige" paint. Perfect! I used an old piece of a utility sponge to lightly coat the outer part of the textured wall with the darker color both in the recessed part of the main kitchen and the window area.

My son looking up at the new warmer "tuscan look" color in the recess:


I hope it's a tuscan look - kind of aged warmth.  But it was late at night (early this morning) when I was painting it.  It gave a warm glow to the otherwise coldish light of the halogens.  I had to leave early this morning for the Sojo Museum, and I haven't been back home yet, so I don't know if it looks decent during the daylight.  Hopefully, it's 100% finished.

Paint the Tile Edges Black
As described in Day 71, I made some black clay strips to go above the edges of the tile pieces that fit underneath the cabinets.  But the edges of the exposed tiles was yucky. I had originally planned to edge those tile edges with black tile strips too but my dear sister said she didn't think that was necessary.  However, something needed to finish off the edges. So I got out my trusty paints and hand painted all of the edges. Next week, I shall seal the black edges with several coats of polyurethane so they cannot be easy washed off when the tiles are cleaned in the future. 90% complete.

The left edge of the tile has been painted black. Notice the niche on the right side for a few cookbooks and a vase wrapped with African beads above the books:

The right edge has been painted black:


The left edge of the tile has been painted black:


What's Left for the Kitchen Remodel:
Sew the window treatments
Replace the corroded miniblinds
Finish the third niche
Staple the excess wires from the under-cabinet lights to the cabinet
Build out the soffit on top of the pantry by 2"
Recover the white dining room chair seats with African fabric

Friday, January 15, 2010

1/15/10 - Day 71 - Making Clay Strips

All of the 2"x2" tiles were in place and I cut up some tiles to fit around the electrical sockets. But there were still 124" of blank 1/2" spaces at the edges of the colorful tiles and the adjacent cabinets and about 74" of 1" blank spaces under the cabinets and microwave oven.


This morning, I took two 5 pound pieces of clay off a 25-pound block of red 50/50 clay.


Then I rolled the pieces into 15"x10" pieces to fit into metal cookie sheets.


Now to carefully measure the length of the individual pieces I needed, plus about 10% to account for shrinkage. Since 1/2"x4" pieces were needed, I cut them at about 3/4"x4.5" strips.


Clay cut into 1/2"x4" strips in this cookie sheet, and 1/2"x2" strips in another sheet, and 1"x1" strips in another.


Cookie sheets were put into a 190-degree oven to dry out for 2 hours until they were mostly dry.


A damp sponge smooths out the edges of cut tile strips. Sharp edges will become like glass knives after firing if not smoothed out aforehand.


a damp sponge ensures that the tops of the clay strips are not sharp.


The partially-dried sheet of clay strips is ready for firing.


Here, the dried strips are moved from the cookie sheet onto a kiln shelf. The pieces are crowded together on the shelf so little space exists between the pieces.


Painting combination of black-colored glazes. Two layers of glaze. Yes! I did not fire the clay in the kiln before glazing! This can be dangerous, for if the first-time fired clay explodes in the kiln then glaze chunks will fuse to the sides of the kiln - and that's REAL BAD.  Conventional wisdom and class teaching dictates that clay must be dried and fired in a kiln to at least 1860 degrees (cone 06) before painting a color glaze on the pieces and firing them a second time. But I didn't want to wait that long and decided to do all of the steps at one time.  The danger in doing this is immense, for if one of the clay strips is not dry enough, or has an air pocket in it, it will explode in the kiln and the glaze (which essentially is glass) will adhere to the walls and shelves of the kiln. That would render the kiln unusable. So I took the chance anyway!


Glazed clay strips are ready for the kiln.


The glazing was done next to the new sink.


Filling the kiln with about 7 shelves full of handmade tiles.


I turned all three kiln heater controls to "low" and let them "cook" for a few hours while I went to the store.  Coming back, I checked to make sure there had been no explosions - and there hadn't - so I turned the kiln controls up to "HIGH" and set the timer for 5 hours.  A "cone" is a small piece of hardened clay that matches the type of clay used.  The cone is fit inside the heater mechanism; when the cone gets hot enough, it bends, thus shutting off the heater to stop the "cooking." The kiln uses "cones" to determine when the load has "cooked" enough time, but having a timer is a backup in case the cone method doesn't work.  So off I went with the kiln cooking, to enjoy my weekend with my main squeeze.

1/10/10 - Day 66 - All Tiles In Place!

Now for the last wall!  I laid out the pattern onto the countertop, then troweled on the thin-set morter in swirls on the wall.


Putting the tiles on, one by one.


Almost finished with the 2x2" tiles. I may cut some tiles diagonally to form a curved line from below the cabinet to the edge of the countertop.


Some tiles must be cut to fit around the electrical sockets.


Fitting tiles around the sockets.


Voila! Success around the sockets.


Now to finish up the 2x2" tiles between the sink and refrigerator.


FInished tiling around the side of the microwave up to the kitchen ceiling.


FInished tiling to the left of the sink.

Saturday, January 9, 2010

1/2 to 1/8/09 - Days 55-62 - TILE BLING!!

Jan 2:

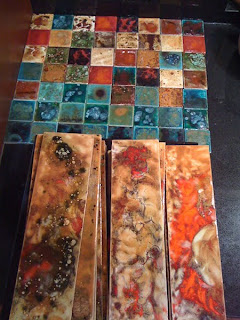
I made 120 more tiles for the kitchen yesterday. Sadly, the colors were too bleached out or too lime green, so I had to redo most of them today. They are nestled in the warm kiln right now - like I'm supposed to be nestled in my warm bed right now! (LOL)


Time to load the kiln:


Many shelves filled with the glazed tiles.  Ready for firing about 5 hours at 1860 degrees.


The colors change dramatically after the extreme heat of the kiln.  A reddish color unfired might actually be emerald green after firing!


These tiles required two or three different aplications of glaze to get these textures/


Jan 4:

So about 75 of yesterday's 120 tiles had to be reglazed and are in the kiln right now. I had forgotten that you cannot put red glazes in the kiln with copper-containing glazes because it has a chemical reaction that obliterates the reds. So back to the drawing board. Hopefully this kiln-full will be the last!


Jan 6:

Down to business. Most of the last batch of tiles looked great, so tonight I'm starting to lay out a couple of hundred 2x2" tiles on the new black countertops. They will become sparkling new back splashes for the remodeled kitchen. DRAMA!


Jan 7: 

Real busy tweaking the tiles, making sure the colors and textures are just right on each wall.


Jan 8:
Dug out my notched trowel from the tool shed. I wanted to at least get a couple of rows of tiles on tonight. I'm going to have to cut several tiles around the sockets and light switches, so getting some rows done tonight will be great. Unfortunately it's already after 10 PM and I want to get some sleep.  Work, work, work!  Here we go . . . Two hours later, here's the progress:


Using thin-set mortar, I started with the bottom rows of the smallest wall.  I used 1/8" spacers between the tiles to (hopefully) keep the rows and columns straight.


I'll have to cut the tiles closest to the sockets . . . tomorrow!


Here's the wall closest to the refrigerator.


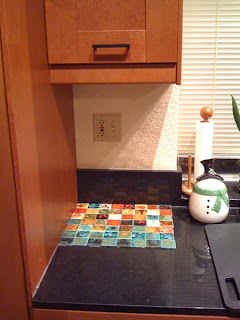
Here are the first two walls almost done.  I like it!  Just a little TILE BLING in an otherwise sparse kitchen.